A loose drawer slide can turn a quiet bedroom into a daily source of frustration. The drawer may scrape, tilt, or stop halfway, especially when its wooden sides carry heavy clothing. Before replacing the entire chest, inspect the slide, screws, drawer box, and cabinet frame. Small alignment problems often cause larger symptoms.
This guide explains How to fix a drawer slide on a chest of drawers using five practical methods. You may need a screwdriver, measuring tape, level, drill, wood filler, and replacement screws. A flashlight helps reveal bent metal, worn rollers, or stripped holes behind the drawer. I have found that tightening one screw rarely solves the real problem. Sometimes the cabinet itself has shifted slightly over time. That detail is easy to miss.
Measure carefully.
The repair should begin with the drawer removed and the cabinet supported securely. Check whether the slide is loose, bent, dirty, or installed unevenly. Cleaning may solve a sticky movement, while reinforcing damaged wood may provide a longer-lasting repair. If a slide is severely bent, replacement is usually safer than forcing it straight. Avoid overloading the drawer after repair, because excess weight can quickly damage fresh screw holes.
These methods are based on common furniture-repair practices and careful inspection. Still, older chests can contain unusual slide designs, and one approach may not fit every model. Test the drawer gently after each adjustment. A smooth glide, even gaps, and firm mounting points are better indicators than appearance alone. Take your time.
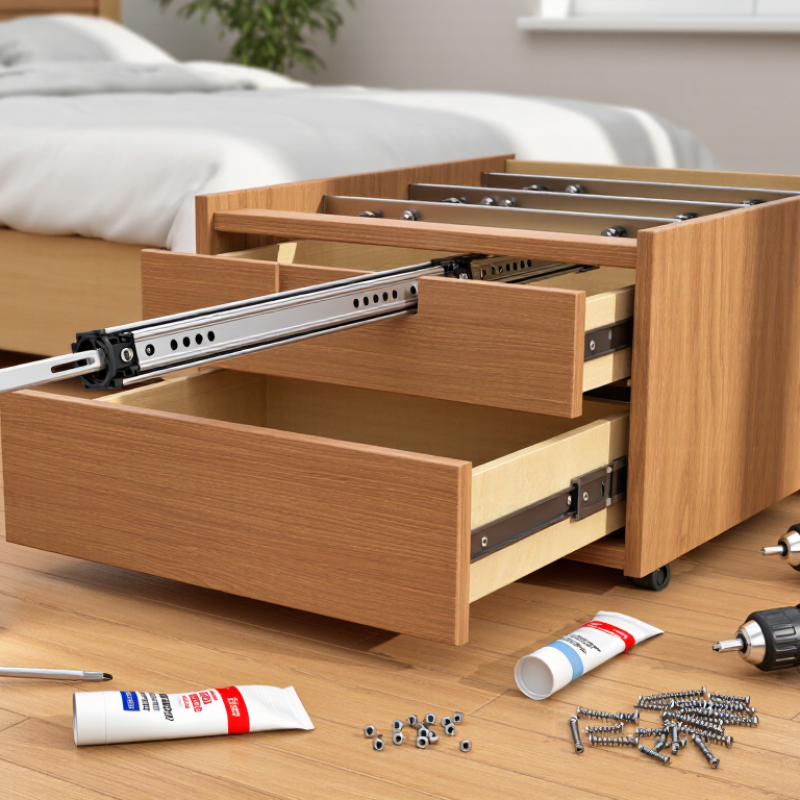
5 Best Ways to Fix a Drawer Slide on a Chest of Drawers?
Identify the Cause of the Drawer Slide Failure
A drawer slide rarely fails without a reason. Check the drawer first. Remove it and inspect both runners under bright light. Look for bent metal, cracked plastic, missing screws, or packed dust. A drawer that scrapes on one side usually signals misalignment, not a defective slide. Measure the gap between the drawer and cabinet on both sides. Uneven gaps expose installation errors quickly.
The ANSI/BIFMA X5.9 storage-furniture standard includes durability testing with repeated drawer cycles, often reaching 50,000 operations. Your chest may never face that workload, but the benchmark explains why loose hardware matters. The U.S. Consumer Product Safety Commission also reports hundreds of furniture tip-over deaths across recent reporting periods, showing that unstable storage furniture deserves careful inspection. A damaged slide can increase uneven loading and cabinet movement.
I have blamed the slide too quickly before. Sometimes the real cause was an overloaded drawer or a warped cabinet panel. Check the drawer’s weight, then tighten every fastener without stripping the holes. Replace matching slides in pairs when one runner is bent. Do not force a drawer that stops halfway. A small obstruction can hide a larger alignment problem. Test the repaired drawer slowly, with light pressure, before returning heavier items.
Gather the Tools and Replacement Hardware
Before fixing a drawer slide, inspect the damaged hardware under bright light. I use a tape measure, pencil, screwdriver, drill, level, square, and a short wood clamp. A flashlight helps reveal stripped holes and bent brackets. Measure the drawer box length, side clearance, slide extension, and screw-hole spacing. Do not guess. A replacement slide must match the original type, such as side-mount, center-mount, or undermount. Check its stated load rating against the drawer’s contents. Heavy cookware needs stronger hardware than folded clothing.
Buy matching screws, not random leftovers. Their diameter should fit the slide holes, while their length must not pierce the cabinet wall. I once selected a slide with the correct length but insufficient clearance. It looked suitable until the drawer jammed. Measure twice. A small shim, spare screws, and wood filler can rescue uneven or stripped mounting points. Keep a manual screwdriver nearby because a drill can easily over-tighten soft particleboard.
ANSI/BIFMA X5.9-2019 includes functional and durability testing for storage furniture, making secure alignment more than a cosmetic concern. The U.S. Consumer Product Safety Commission reported 71 furniture tip-over fatalities from 2018 through 2022. A loose drawer can increase instability when pulled open. Before installation, empty the chest and check whether it rocks. Test the repaired drawer slowly, then inspect every screw after several openings. My first repair was not perfect; the rear bracket still needed adjustment. That final check matters.
Use this hardware guide to prepare for the most common drawer-slide repairs. Quantities are typical for one drawer and may vary with the slide design.
How to use the chart: Start by tightening the existing screws. If the holes are stripped, use replacement screws or wall anchors. Add wood blocking when the drawer side is damaged, and replace both slides as a pair when the slide is bent or worn.
Remove the drawer and place it on a stable surface. Inspect each slide for bent metal, missing screws, worn rollers, or crushed wood around the mounting holes. Small gaps matter. Clean dust from the tracks with a dry cloth, then check whether both slides sit at the same height. Uneven positioning often makes a drawer scrape, tilt, or stop halfway.
Loosen the mounting screws slightly instead of removing them completely. This allows the slide to move during alignment. Measure the distance from each slide to the cabinet’s front edge, then match both sides carefully. The drawer should enter straight, with equal spacing along its left and right edges. I once tightened one side too early, which forced the drawer out of square. That mistake taught me to test movement before securing every screw. Do not rely only on appearance.
Reinstall the drawer and open it several times without adding weight. Listen for clicking or grinding. If the drawer shifts, remove it again and tighten the screws gradually from front to back. For loose holes, use longer suitable screws only when solid wood remains behind the opening. Soft or damaged material may need a properly fitted wood repair insert. Avoid forcing a stripped screw, because it can enlarge the hole and weaken the joint. A small level can confirm alignment, but smooth movement remains the most useful test.
Not perfect. Test again.
A bent drawer slide usually reveals itself through scraping, uneven gaps, or a drawer that drops when opened. Remove the drawer and inspect both rails under bright light. Do not straighten badly twisted metal. It often bends again under weight. Replace the damaged pair with rails matching the original length, extension type, and load rating. Measure the cabinet depth, drawer width, and mounting-hole positions before buying replacements. A small mismatch can leave the drawer crooked.
I learned this the hard way. One replacement rail looked correct, but its mounting holes sat three millimetres higher. The drawer rubbed against the frame. Mark the old screw locations with a pencil, then test-fit each rail loosely. Keep the rails parallel and level. Use a short spirit level, not only the drawer front. Tighten screws gradually. Check the manufacturer’s load rating, and avoid loading the drawer immediately. The U.S. Consumer Product Safety Commission estimated 22,000 furniture tip-over injuries and 71 deaths from 2018 to 2020. A loose drawer can increase instability, especially on a tall chest.
Tips: Replace both rails as a pair. Use screws that do not pierce the cabinet. Add a rear stop if the drawer travels too far. Test with light items first, then heavier contents. Also secure the chest to the wall when appropriate. My earlier repair ignored this step. That was not careful enough. Standards such as ANSI/BHMA A156.9 also emphasize consistent cabinet hardware performance, but real furniture may have worn or uneven panels. Recheck the drawer after several openings.
After repairing a drawer slide, do not judge the fix by appearance alone. Pull the drawer out slowly, then push it closed with one hand. It should travel evenly without scraping, tilting, or stopping halfway. Listen for clicking sounds. A loose screw often reveals itself during movement. Remove the drawer and inspect both slides from eye level. The tracks should remain parallel, with their front edges aligned. Even a small height difference can cause binding.
Test the drawer with its normal contents, not an empty box. Place heavier items near the center, then open and close it ten times. Check whether the drawer sags, shifts sideways, or needs extra force. I once trusted a smooth first test and ignored a slight wobble. A week later, the rear screw pulled loose. That mistake taught me to test under realistic weight. If the slide still feels rough, stop forcing it. Realign the slide, replace damaged screws, or inspect the drawer side for warping.
Future problems often begin with small habits. Do not overload the drawer or slam it shut. Tighten mounting screws during routine furniture checks, especially after humidity changes. Keep crumbs, grit, and loose hardware out of the track. A thin, suitable lubricant may help some metal slides, but excess oil attracts dust. Test the drawer again after several days of normal use.
Remove the drawer and inspect both runners under bright light. Look for bent metal, cracked plastic, missing screws, dust, or obstructions. Measure both side gaps. Uneven gaps often indicate misalignment, not slide failure.
The runners may not be parallel. A warped drawer or cabinet panel can also cause scraping. Check the front and rear gaps with a tape measure. Do not force the drawer.
Use a tape measure, pencil, screwdriver, drill, level, square, and short clamp. Keep a flashlight nearby. A manual screwdriver gives better control in soft particleboard.
Match the original slide type, length, extension, clearance, and screw-hole spacing. Check its load rating against the drawer contents. Folded clothing needs less support than heavy cookware.
Choose screws that fit the slide holes securely. Their length must not pierce the cabinet wall. Random leftover screws can cause damage. Measure twice.
Replace matching slides in pairs when one runner is bent or badly damaged. Unequal slides may create uneven movement. Check the mounting points before installation.
Start with an empty drawer. Pull it slowly, then close it with one hand. Listen for clicking or scraping. Add normal contents and open it ten times. Stop if it tilts or needs extra force.
Avoid overloading and slamming the drawer. Keep crumbs, grit, and loose screws out of the tracks. Tighten hardware during routine checks. Excess lubricant attracts dust.
Do not ignore a small wobble. I once trusted a smooth first test, and a rear screw loosened later. Remove the drawer and inspect the brackets again. The fix may need one final adjustment.
Learning how to fix a drawer slide on a chest of drawers begins with identifying the source of the problem. Check whether the drawer is sticking because of loose screws, poor alignment, worn hardware, or a bent slide rail. Gather basic tools such as a screwdriver, measuring tape, level, replacement screws, and compatible slide components. Remove the drawer carefully, inspect each attachment point, and tighten or reposition any loose parts so both sides sit evenly.
If a slide rail is warped, cracked, or badly worn, replace it with a properly sized rail rather than forcing it back into shape. After installation, test the drawer several times to confirm that it opens smoothly, closes fully, and remains level. To prevent future problems, avoid overloading the drawer, distribute its contents evenly, and periodically check the screws and slide alignment. Simple maintenance can extend the life of the drawer and reduce the chance of repeated failures.

Jaydee furniture